
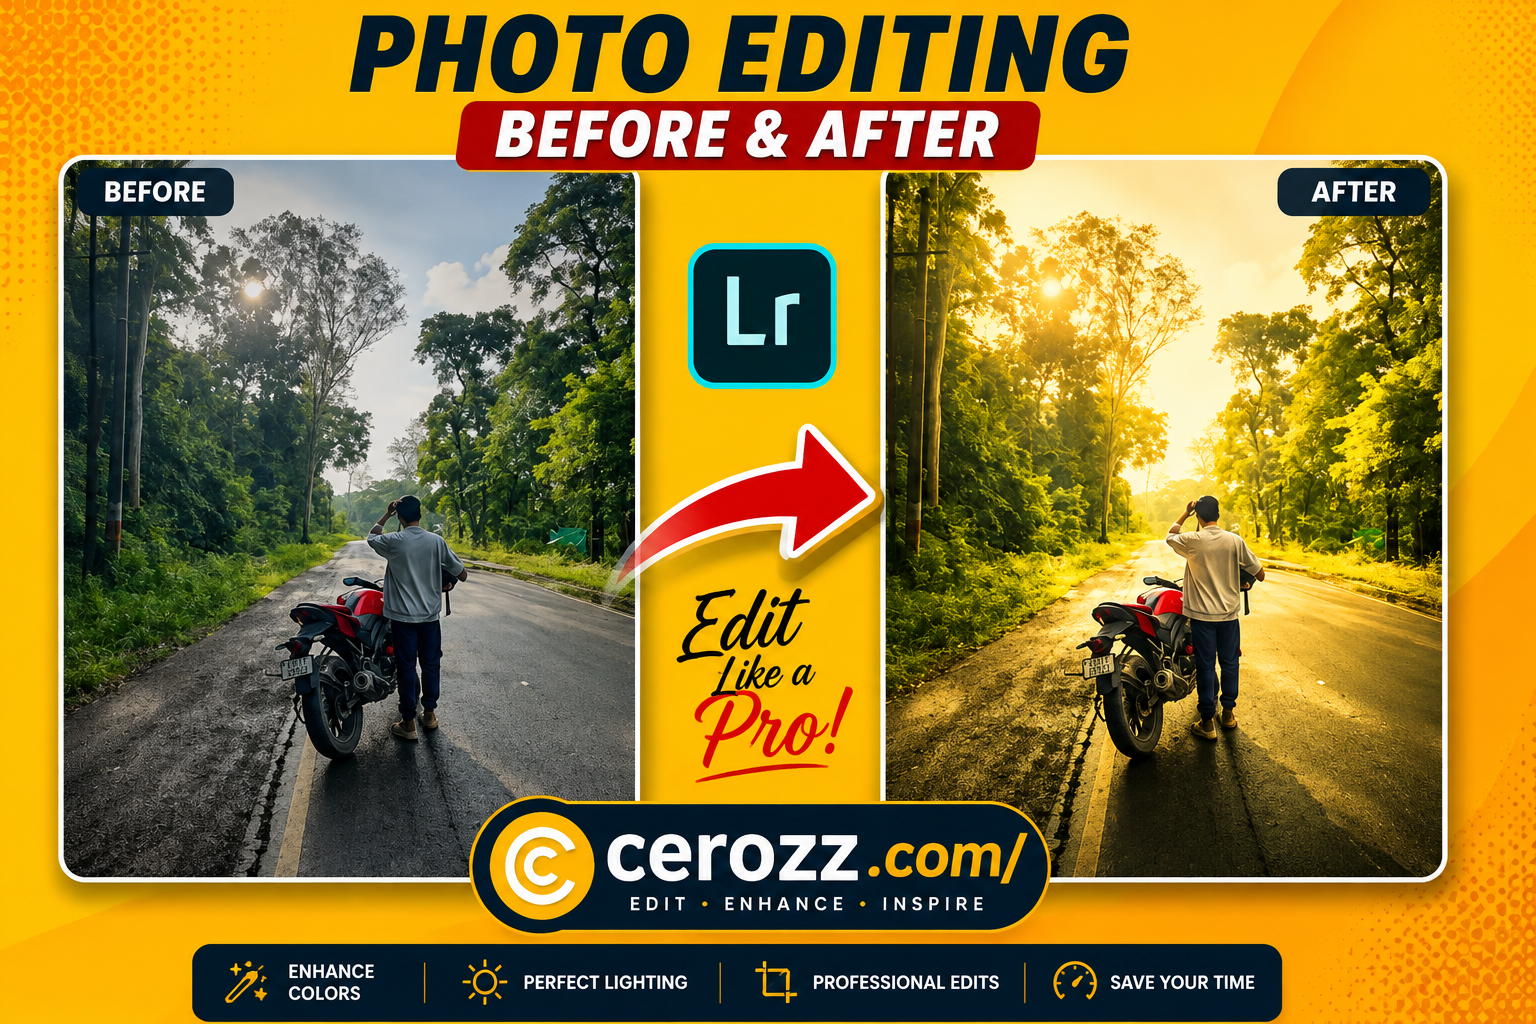
Introduction: The Magic of Golden Forest Photography
There’s something truly special about capturing a forest road bathed in golden sunlight. The way the light filters through the trees, creating long shadows and warm glows, it’s pure magic. Whether you’re a travel photographer, a bike enthusiast, or just someone who loves nature photography, mastering this editing style can take your photos to the next level.
In this comprehensive guide, I’ll walk you through every step of creating that stunning golden forest effect. No complicated jargon. Just simple, practical techniques that actually work.
What Makes This Editing Style So Special?
Golden forest edits have become incredibly popular on Instagram and other social media platforms. But why? Let me break it down:
The Warm Sunlight Effect
That beautiful golden glow creates a cinematic feel that instantly grabs attention. It makes viewers feel like they’re right there in the scene.
Rich, Vibrant Colors
The deep greens and warm yellows create a color palette that’s both natural and visually striking. These colors pop on any screen.
Versatile for Different Subjects
This editing style works perfectly for:
- Travel photography
- Bike and motorcycle photos
- Nature and landscape shots
- Portrait photography in natural settings
- Instagram reels and posts
High Engagement
Photos with warm, cinematic tones consistently get more likes, comments, and shares. There’s just something about this style that resonates with people.
Understanding the Key Elements
Before we dive into the settings, let’s understand what makes this edit work:
Proper Exposure Control
Getting the exposure right is crucial. Too dark and you lose detail in the shadows. Too bright and the golden effect gets washed out. We need that perfect balance.
HSL Adjustments
HSL stands for Hue, Saturation, and Luminance. These adjustments let us fine-tune individual colors in the image. For this edit, we’ll focus heavily on greens and yellows.
Masking Techniques
Masking is where the real magic happens. It allows us to apply different edits to different parts of the image. The sky gets one treatment, the sun area gets another, and the subject gets special attention.
Step-by-Step Editing Guide
Let’s start with the basic panel adjustments. These are the foundation of our edit.
Basic Panel Settings
Exposure: +0.40
We want to brighten the image slightly to capture that golden glow. Don’t overdo it though. A small increase is all we need.
Contrast: +30
Adding contrast gives the image depth and makes the colors pop. The difference between light and dark areas becomes more dramatic.
Highlights: -60
This is crucial. We want to tone down the brightest areas so they don’t blow out. The sky and sun reflections need to stay controlled.
Shadows: +45
Bringing up the shadows reveals all that beautiful detail in the darker areas. The ground, the trees, everything becomes more visible.
Whites: +20
A slight increase in whites makes the bright areas look clean and crisp.
Blacks: -25
Crushing the blacks a tiny bit adds that cinematic depth. It makes the image feel more dramatic and polished.
Color Settings
Temperature: +18
We’re adding warmth here. This is the foundation of that golden look we’re after.
Tint: +5
Just a tiny bit of magenta to balance the greens and warm tones.
Vibrance: +25
Vibrance increases the intensity of more muted colors. This makes the scene feel rich and alive without being over-saturated.
Saturation: -5
We reduce overall saturation slightly to keep things natural. The vibrance adjustment already gave us the color pop we need.
HSL Panel – Fine-Tuning Individual Colors
This is where we really shape the look of our image.
Green Adjustments
Green Hue: -15
Shifting the green hue slightly gives us that rich, deep forest green. It moves away from yellow-green towards a cooler, more natural green.
Green Saturation: +20
We want the greens to be vibrant but not artificial. This boost makes the foliage pop without looking fake.
Green Luminance: +10
Making the greens slightly brighter helps them stand out against the warm golden tones.
Yellow Adjustments
Yellow Hue: -10
Shifting yellow towards green helps create a more cohesive color palette. It prevents the yellows from becoming too orange.
Yellow Saturation: +15
Enhancing the yellows helps create that beautiful golden glow we’re after. This is what gives the image its warm, sunny feel.
Blue Adjustments
Blue Saturation: -40
We’re reducing the blue saturation significantly. This helps the warm tones dominate the image. The sky becomes less distracting and blends better with the forest scene.
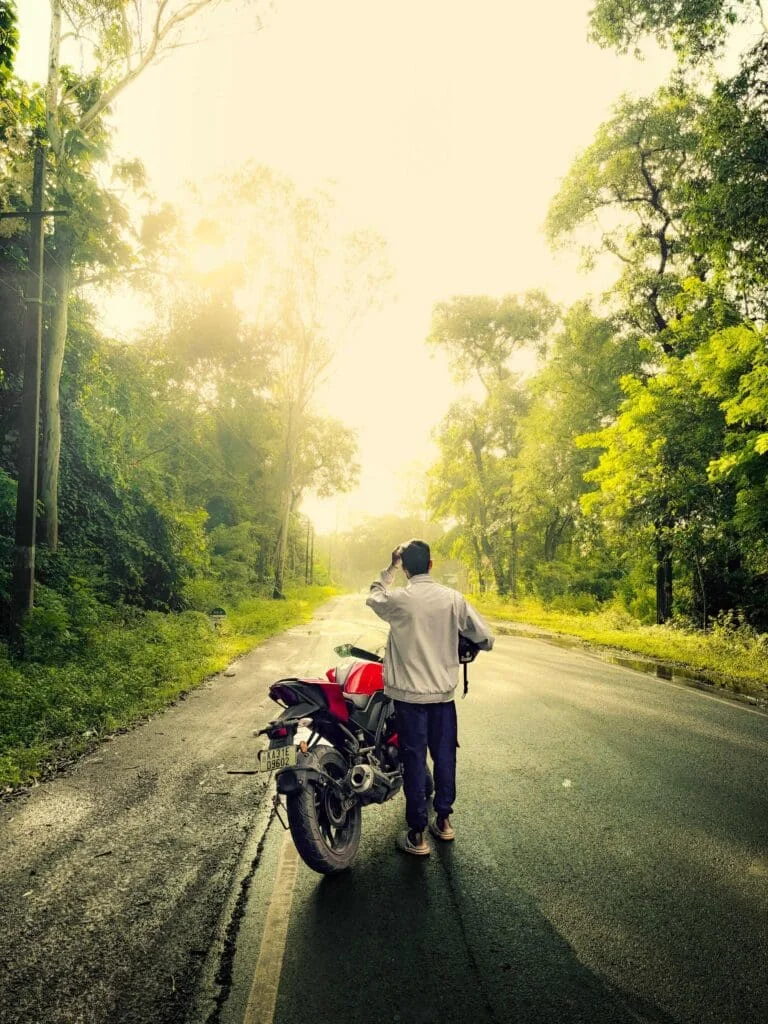
The Magic of Masking
Masking is where this edit goes from good to stunning. Let me explain each mask:
Sky Mask – Reduce Highlights
The sky in a forest photo often competes with the golden glow we’re trying to create. By using a sky mask to reduce highlights, we make the sky less bright and keep focus on the forest.
How to do it:
- Select the sky using the auto-select tool
- Reduce highlights by -20 to -30
- Maybe add a slight coolness to balance the warm forest below
Radial Mask on Sun Area – Increase Exposure
The sun area should glow, but we want it to be a controlled, cinematic glow.
How to do it:
- Create a radial mask around where the sun is in your image
- Increase exposure by +0.30 to +0.50
- Slightly increase warmth in this area
- Feather the edges so the transition is smooth
Subject Mask – Add Clarity & Brightness
Your subject should be the focal point of the image. Whether it’s a person, a bike, or a car, it needs to stand out.
How to do it:
- Use the auto-select tool or brush to select your subject
- Increase clarity by +15 to +20
- Add brightness by +10 to +15
- Add a little contrast to make the subject pop
- Maybe add a slight warmth to match the golden feel
Why This Golden Forest Edit Works So Well
Let me explain why this combination of settings is so effective:
Warm Sunlight Tone Creates Cinematic Feel
The warm temperature combined with the golden highlights gives the image a film-like quality. It doesn’t look like a typical smartphone photo. It looks intentional and artistic.
Rich Green Color Makes Nature Photos Attractive
The careful balance of green hue, saturation, and luminance creates forest colors that are both natural and visually appealing. The greens don’t look fake. They look enhanced in a way that feels authentic.
Perfect for Travel & Bike Photos
This editing style adds drama and emotion to travel and bike photos. The contrast between the warm light and dark shadows makes the image feel dynamic and exciting. It makes the viewer feel like they’re on the journey.
Instagram Reels and Posts Ready
This style was basically made for Instagram. The warm tones, the rich colors, the cinematic feel – it’s exactly the kind of content that performs well on social media.
Common Mistakes to Avoid
❌ Over-Editing the Golden Effect
It’s easy to get carried away with the warmth and saturation. Keep it natural. The edit should enhance the photo, not completely transform it.
❌ Ignoring the Shadows
Don’t leave your shadows too dark. The whole point of this edit is to reveal detail in both light and dark areas.
❌ Forgetting to Use Masks
Applying the same settings to the entire image won’t give you the same results. Masks are essential for this style.
❌ Going Overboard with Saturation
Vibrant colors are good, but too much saturation looks artificial. Less is often more.
Pro Tips for Better Results
Shoot During Golden Hour
The time just after sunrise or before sunset gives you the best natural light to work with. Your edits will look even better if you start with great light.
Use a Clean Image
Start with a sharp, well-composed image. Editing can improve a photo, but it can’t fix fundamental issues like blur or bad composition.
Save Your Presets
Once you’ve created this edit, save it as a preset. This way you can apply it to other photos with one click.
Practice Different Lighting Conditions
This edit works best in certain light conditions. Practice with different photos to see how the settings need to be adjusted.
Conclusion
Creating that beautiful golden forest edit isn’t complicated. It just takes understanding a few key techniques and practicing them. The warm sunlight effect, the rich greens, the cinematic feel – it’s all achievable with the right approach.
Remember to focus on:
- Proper exposure control
- Careful HSL adjustments
- Strategic masking
- Natural-looking results
Start with the settings I’ve shared and adjust them based on your specific photo. Every image is different, and you’ll need to fine-tune these settings for your specific shot.
The more you practice, the better you’ll get. Soon, you’ll be creating stunning golden forest edits that capture the beauty and magic of nature.